Microsoft Office is considered as the best office toolkit today. Not only familiar to millions of users, but it also satisfies the needs of users, which is not easily found in other office software suites. Microsoft 365 (MS 365) becomes the choice of Enterprises, Schools and Groups.
However, if you are using Gsuite or Email Server but you want to upgrade to Microsoft 365, old data cannot be used on the current source, you need to convert to MS 365 to ensure the data is complete.
You can refer to the article below to perform data conversion.
Step 1: New Register Microsoft 365
- You need to log in to Microsoft Office 365 portal via url: office.com
Username default is admin@domain.onmicrosoft.com
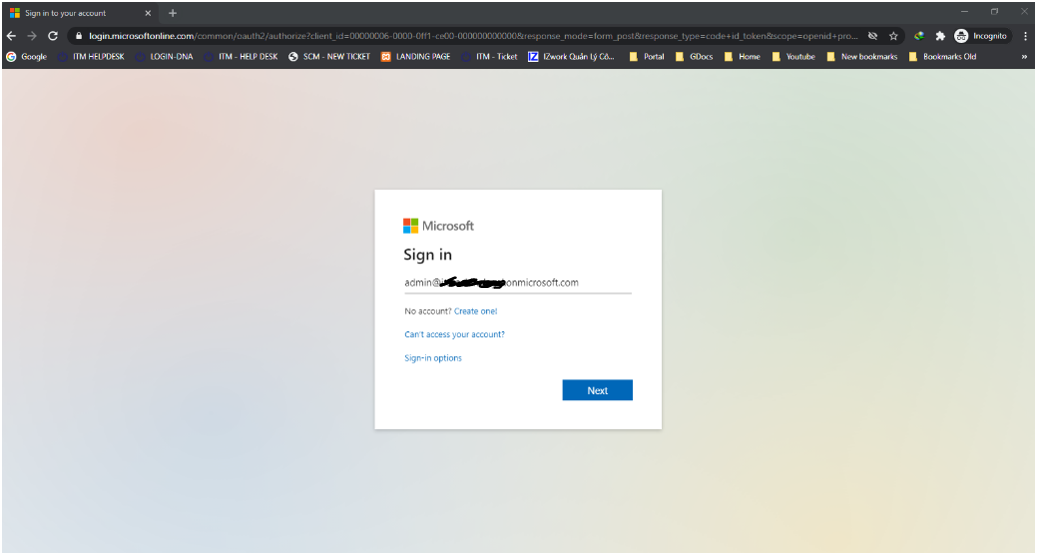
2. After login, you will see display of Microsoft 365 admin center:
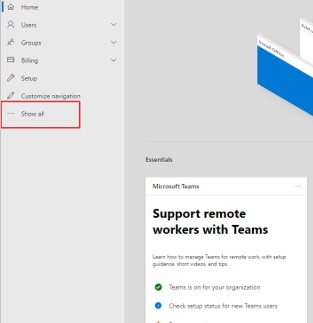
In management interface, click Show all
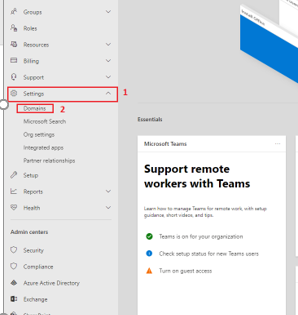
Next, click Setting > Domain
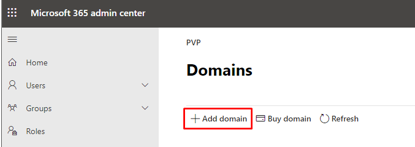
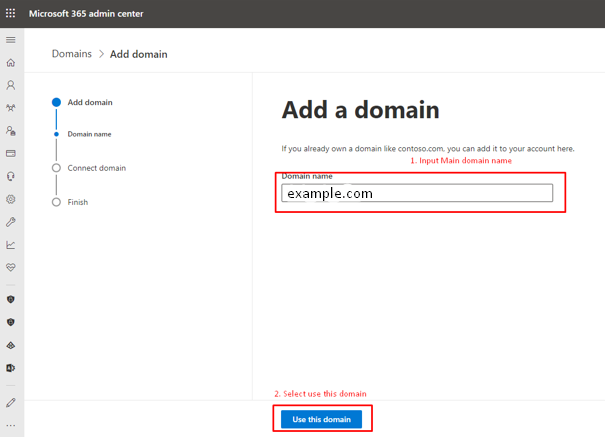
3. You need to create main domain by choose Add domain,
Fill your domain then confirm on Use this domain
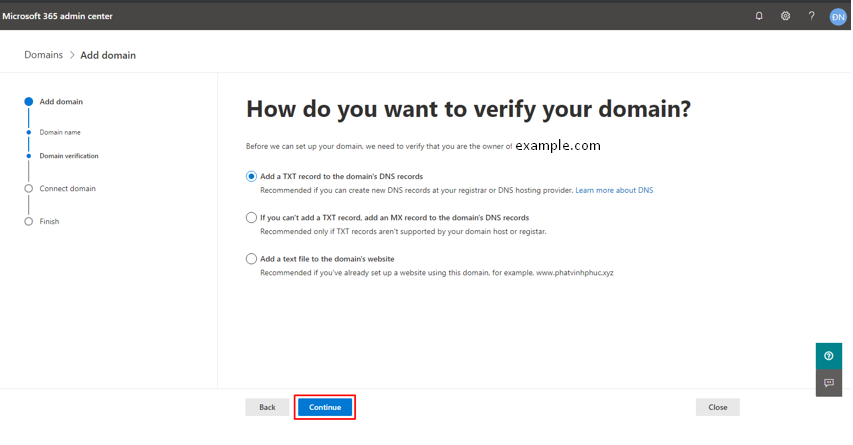
4. At next step, you stick on “Add a TXT record to the domain’s DNS record” and Continue
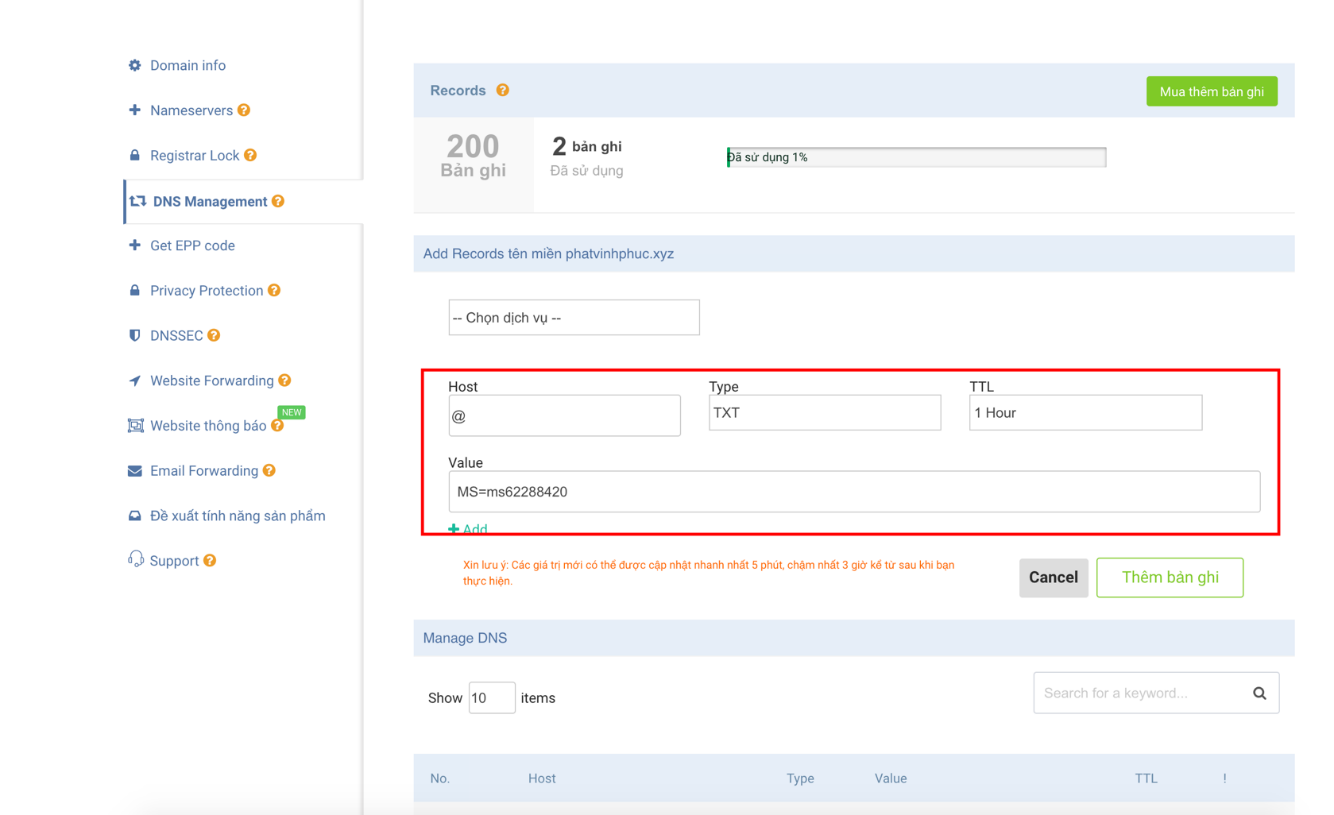
5. Verify Domain: you need switch to Domain cPanel and add the TXT record
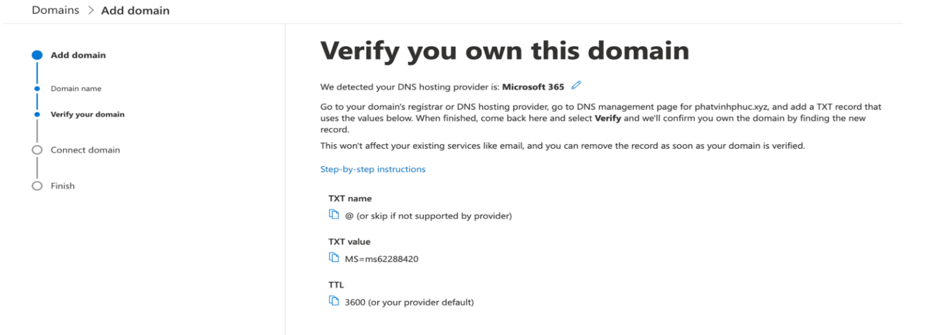
6. Depend Domain provider, they will give you the URL, which you will log on to Add TXT Record to Domain. When you add the record, you need to wait from 5 minute to 3 hour let record can apply to the Domain and after that you return Step 5 choose Verify the Domain connect to portal
7. After you choose Verify, you will choose Continue at next screen.
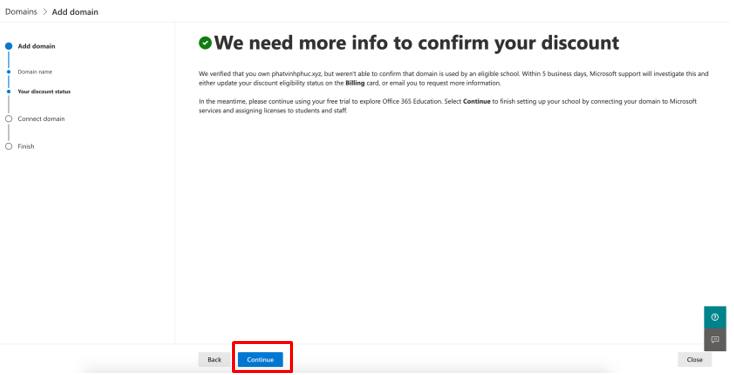
8. Choose Continue let you can connect your domain to Microsoft 365 Portal
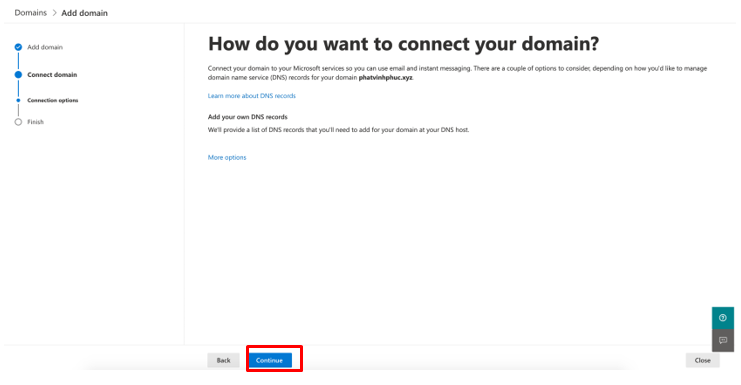
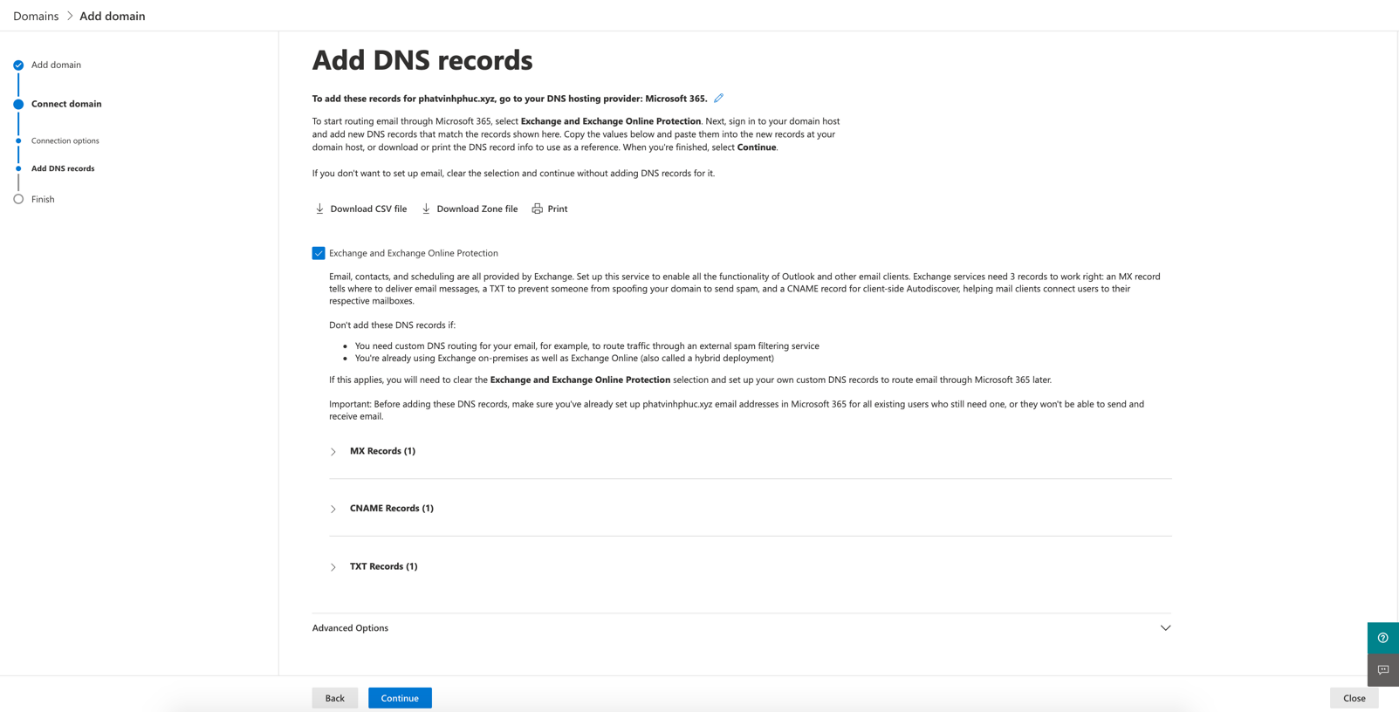
9. Change MX Record: Expand all combo box and add that record to Domain cPane

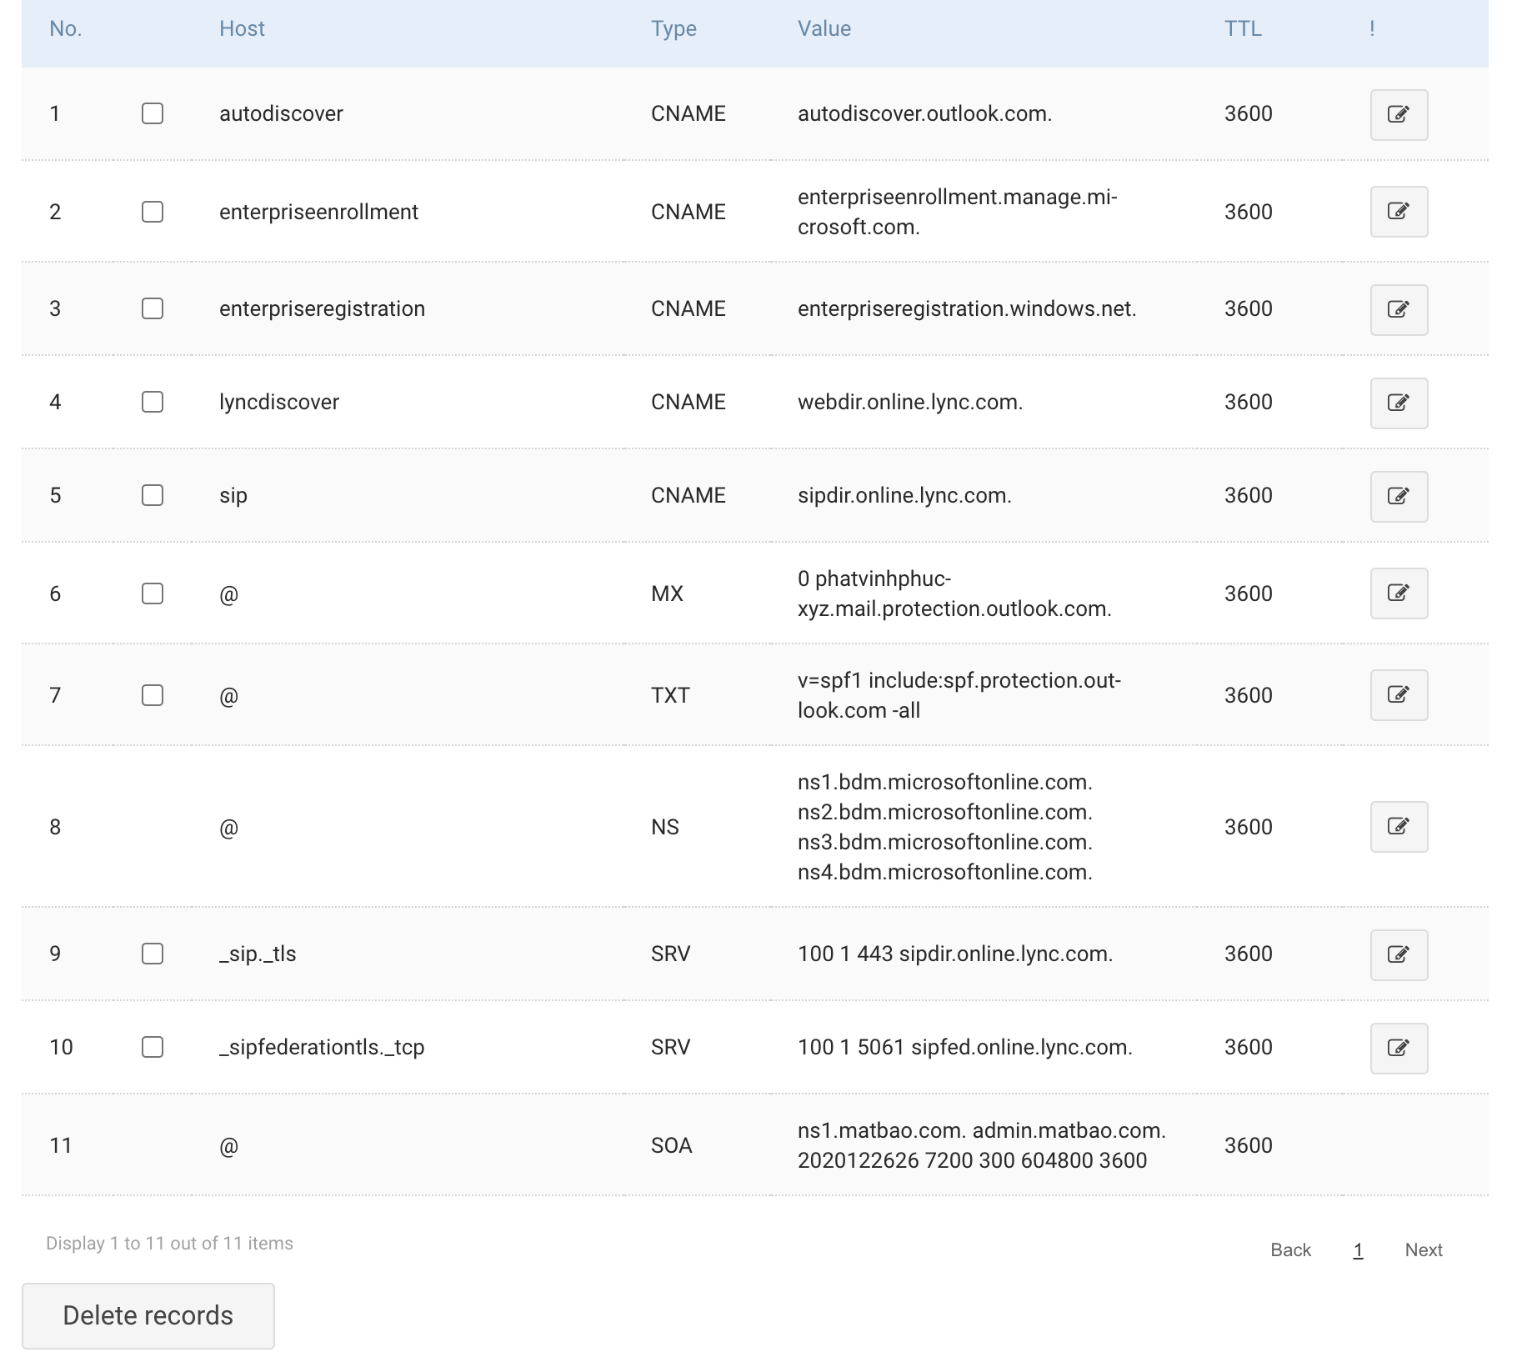
10. Add all Record at previous step to Domain cPanel
When you add all record to the Domain cPanel, you return Portal and choose Continue, if you see notice with error, you will wait from 0.5 hour to 24 hours (depend the Domain provider) let it can update to Domain. After that times you need to choose Continue again.
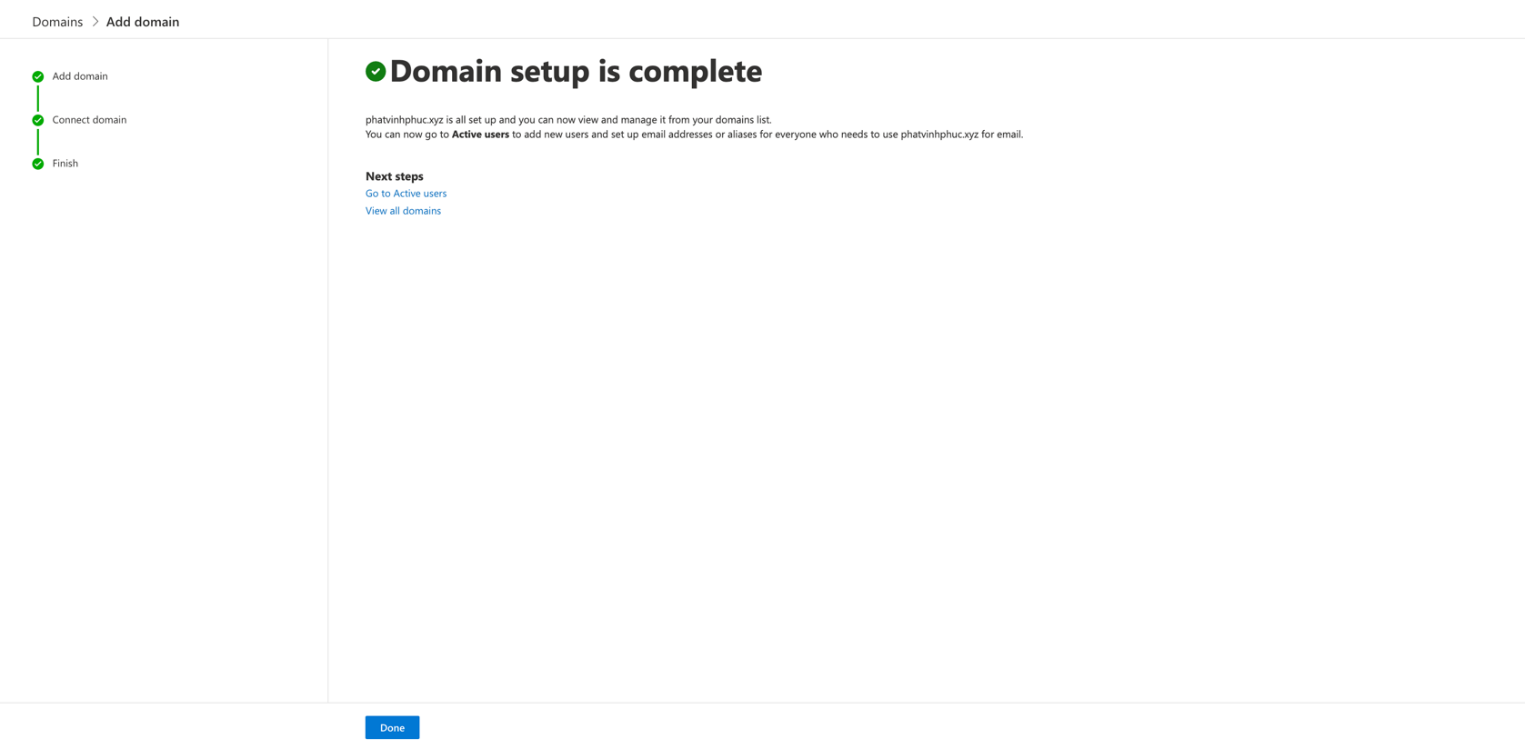
When you see the picture below, Congratulations on successfully connecting your domain to the Microsoft 365 portal.
Choose Done let you come back to add Domain Page.
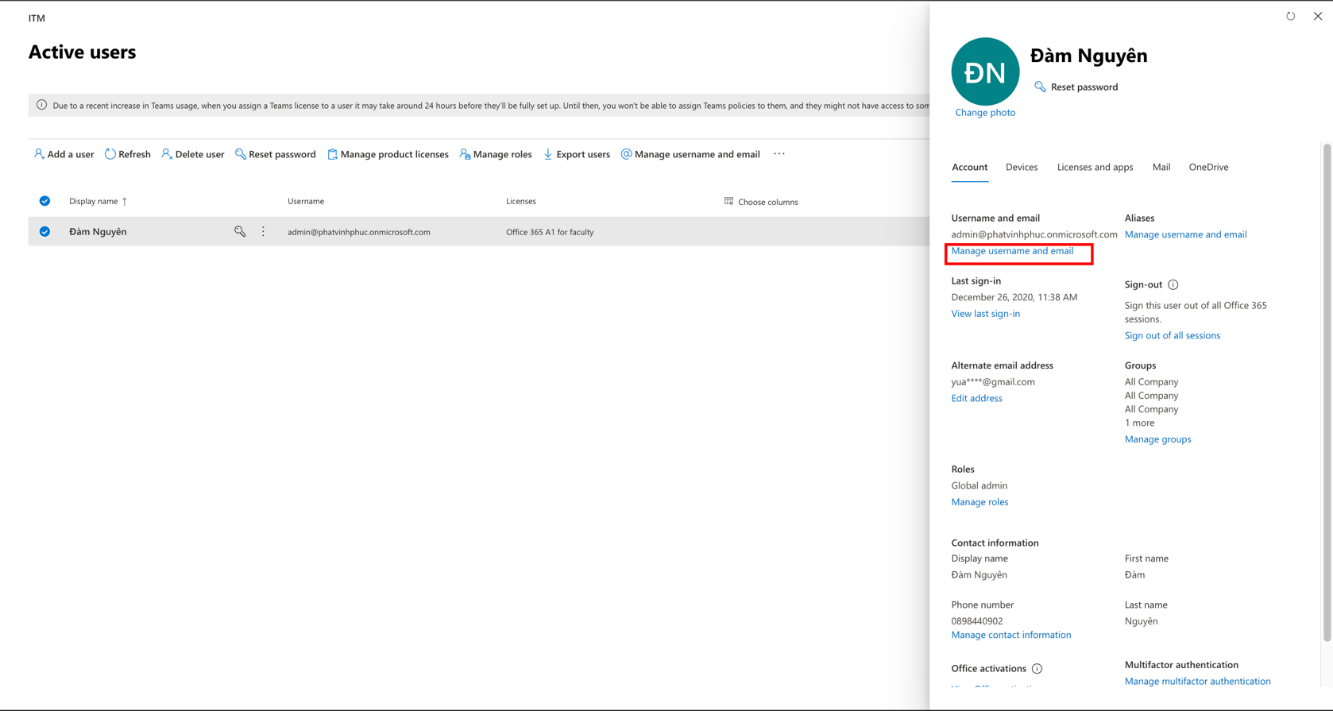
11. Change admin log on ID: choose User -> Active Users and click on the admin’s name

It will expand the menu and choose Manage username and email
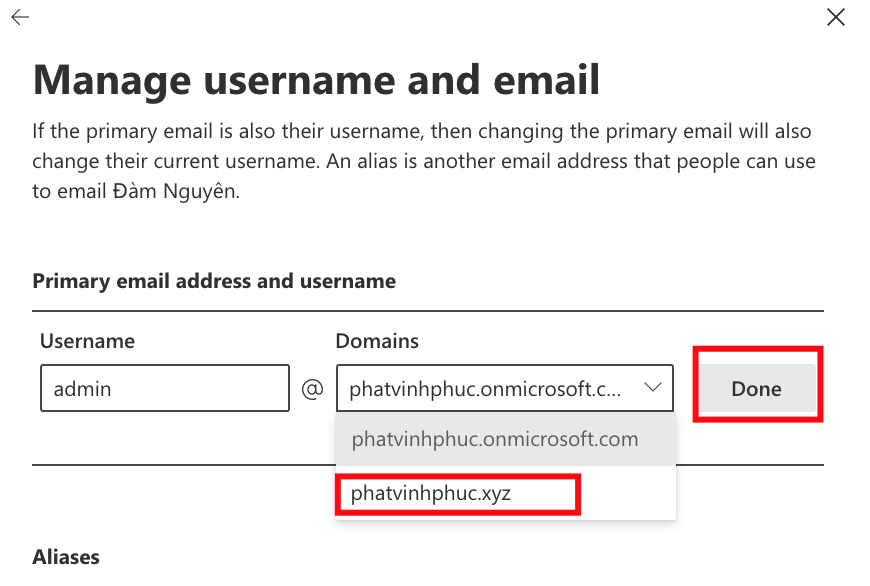
12. Choose Pen icon, expand the combo box, choose the main domain and click Done

13. Click Save change
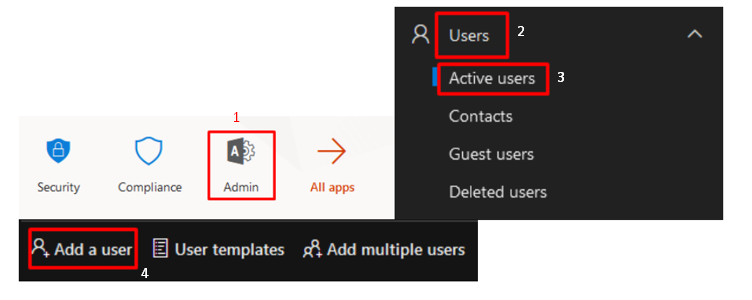
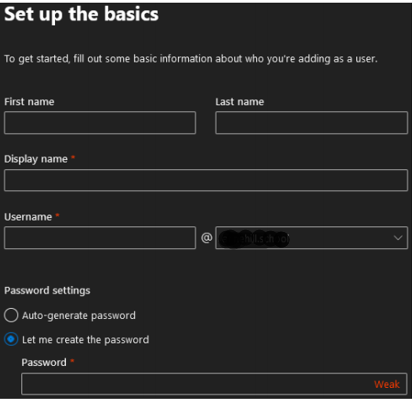
2. In set up the basics > Insert basic information and user’s email
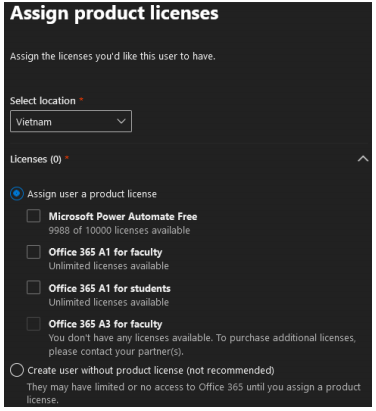
3. In Product license > Assign user a product license
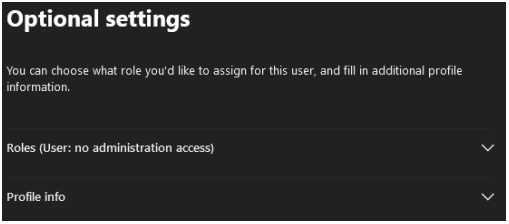
4. Assign Roles this user
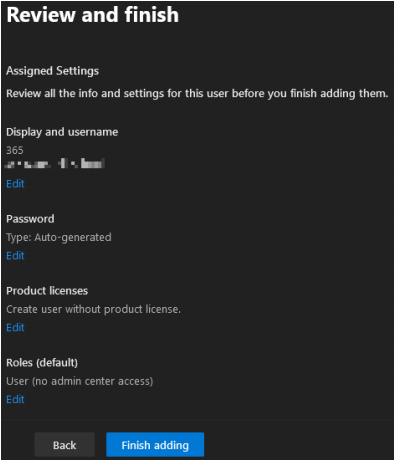
5. Review and finish > Review all info, setting and Finish adding
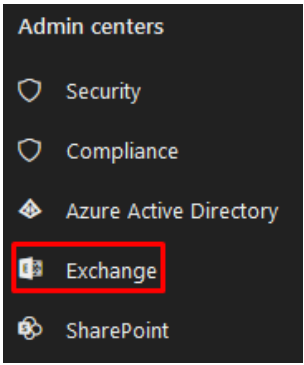
2. In Exchange admin center: Choose Recipients > Migration

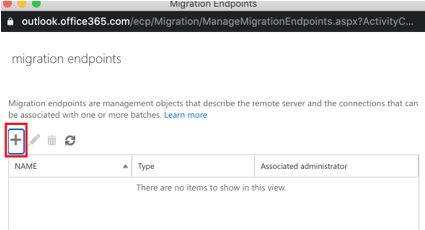
3. Click the icon More at “…” > Migration Endpoints

4. Click New to create a new migration endpoint > Choose IMAP > Next
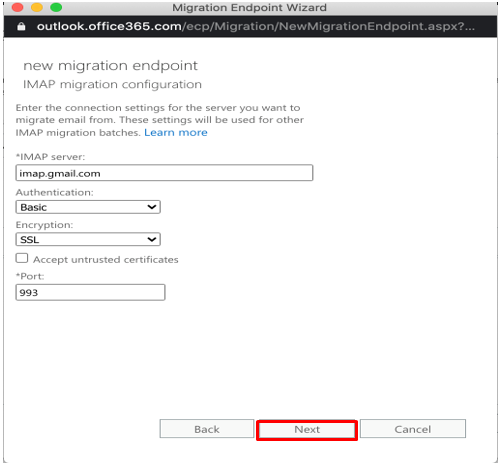
5. On the IMAP migration configuration page, set IMAP server to imap.gmail.com and keep the default settings the same
Click Next. The migration service uses the settings to test the connection to Gmail system. If the connection works, the Enter general information page opens
6. On the Enter general information page, type a Migration endpoint name, for example, Test5-endpoint. Leave the other two boxes blank to use the default values.
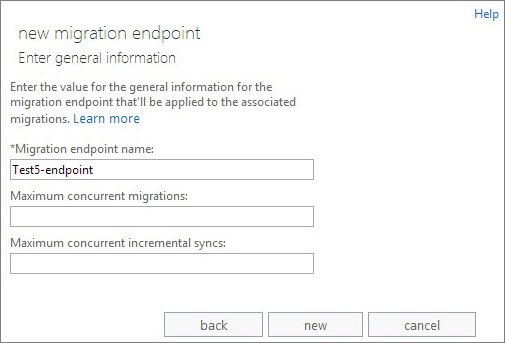
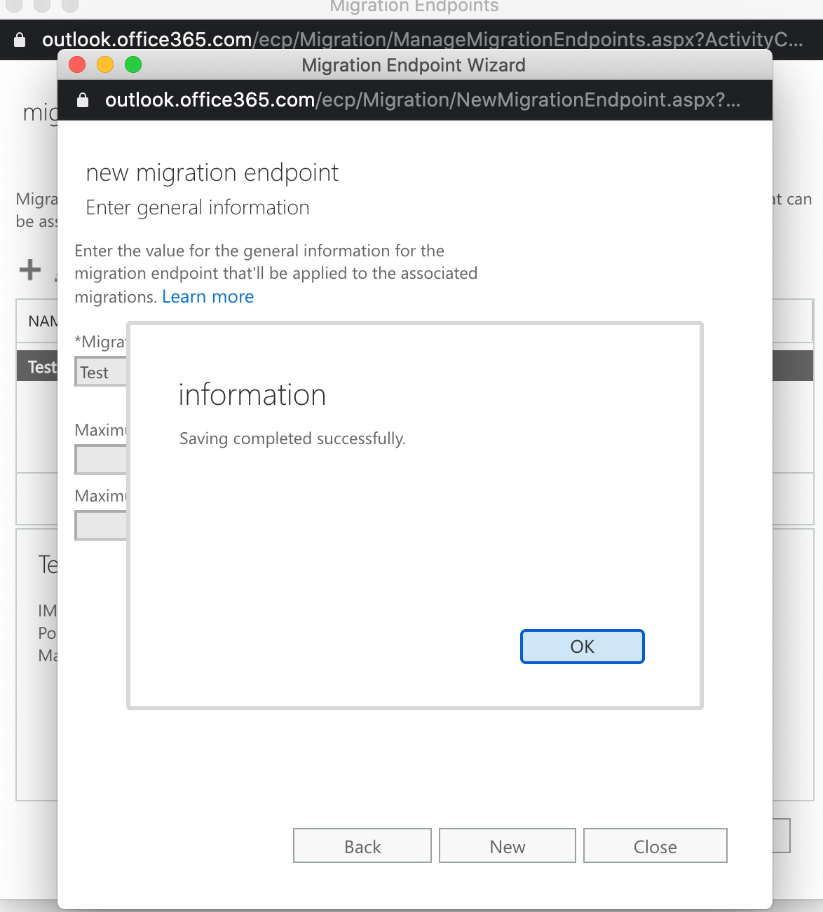
7. Click New to create the migration endpoint and choose OK
B, Create a migration batch and start migrating Gmail mailboxes
You use a migration batch to migrate groups of Gmail mailboxes to Microsoft 365 or Office 365 at the same time. The batch consists of the Gmail mailboxes that you listed in the migration file in the previous Connect Microsoft 365 or Office 365 to Gmail.
In the Microsoft 365 admin center, navigate to Admin centers > Exchange >Recipients > Migration.

2. Click New > Migrate to Exchange Online

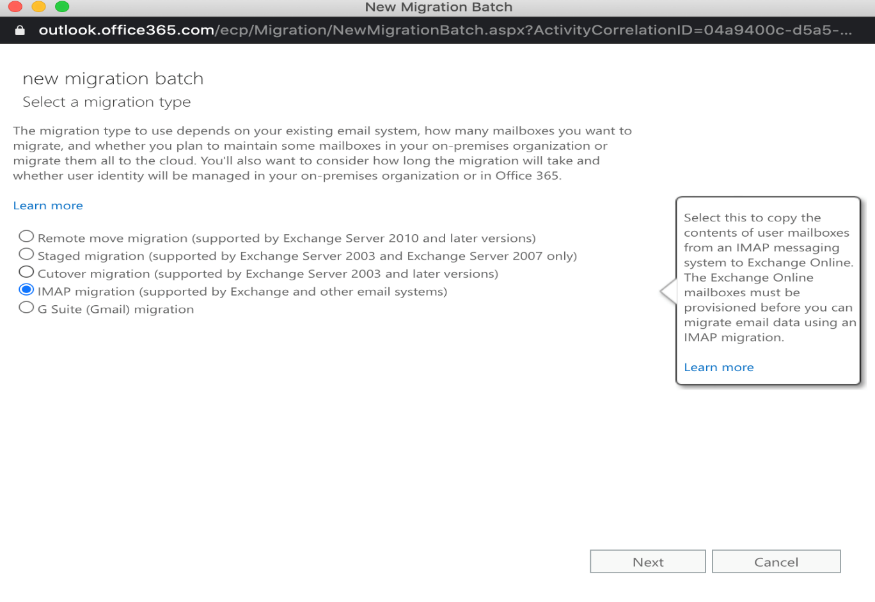
3. Choose IMAP migration>
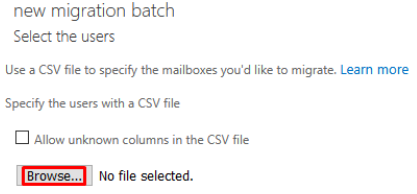
4. On the Select the users page, click Browse to specify the migration file you created. After you select your migration file, Microsoft 365 checks it to make sure.
Browse to CSV file
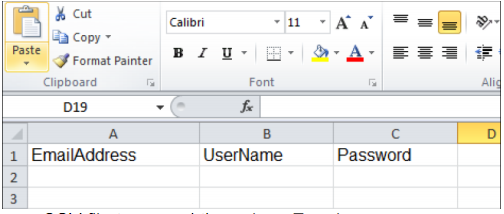
Note: The CSV file need to have format below
- “EmailAddress” in cell A1 for Office 365 email id
- “UserName” in cell B1 for IMAP email id
- “Password” in cell C1 for IMAP Password
➢ It isn’t empty
➢ It uses comma-separated formatting
➢ It doesn’t contain more than 50,000 rows
➢ It includes the required attributes in header row
5. After Microsoft 365 validates the migration file, it displays the number of users listed in the file as the number of Gmail mailboxes to migrate.
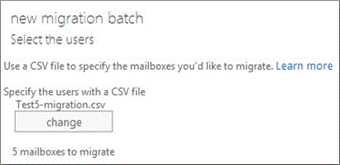
6. On the Set the migration endpoint page, select the migration endpoint that you created in the previous step, and click Next.
7. On the IMAP migration configuration page, accept the default values, and click Next
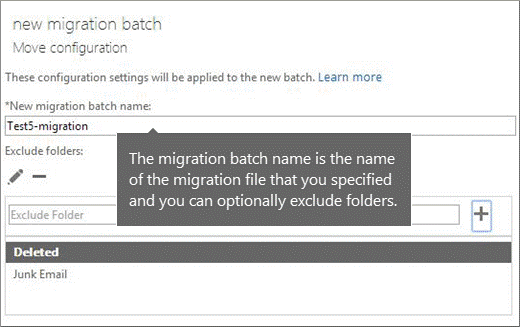
8. On the Move configuration page, type the name (no spaces or special characters) of the migration batch in the box (for example, Test5-migration). The default migration batch name that’s displayed is the name of the migration file that you specified. The migration batch name is displayed in the list on the migration dashboard after you create the migration batch.
You can also enter the names of the folders you want to exclude from migration. For example, Shared, Junk Email, and Deleted. Click Add to add them to the excluded list. You can also click Edit to change a folder name and Delete to delete the folder name.
Click Next
9. On the Start the batch page, do the following:
Choose Browse to send a copy of the migration reports to other users. By default, migration reports are emailed to you. You can also access the migration reports from the properties page of the migration batch.
Choose Automatically start the batch > new. The migration starts immediately with the status Syncing.
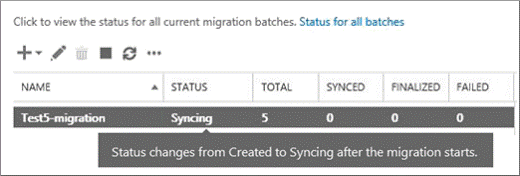
Source: Microsoft
Please leave your contact here, we will response you soon
